Installing Windows on a VPS (Virtual Private Server) from a provider like “HelloRDP” typically involves a series of steps. Here’s a general guide on how to install Windows on a VPS:
Note: The exact steps can vary based on the provider’s interface and options, so be sure to consult any documentation or support provided by HelloRDP.
1. Access the VPS Control Panel:
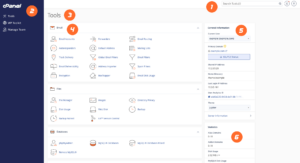
Log in to your HelloRDP account and access the control panel or dashboard for managing your VPS.
2. Create a New VPS:
If you haven’t already created a VPS, you might need to do so. Look for an option to create a new virtual server instance.
3. Choose Windows as the Operating System:
During the creation process, you’ll likely be asked to choose an operating system. Select a version of Windows that you want to install (e.g., Windows Server 2019).
4. Specify Installation Options:
You might need to specify details like the amount of RAM, CPU cores, disk space, and other configuration options for your Windows VPS.
5. Start the VPS:
After configuring the options, start the VPS. This process might take a few minutes.
6. Access VPS Console:
Some providers offer a web-based console to manage your VPS. Use this console to access the VPS as if you were physically present.
7. Mount Windows ISO:
In the VPS console, there should be an option to mount an ISO image (usually in the “Settings” or “Control” section). Upload the Windows ISO image you want to install.
8. Boot from ISO:
Once the ISO image is mounted, restart the VPS. It should boot from the Windows installation ISO.
9. Windows Installation:
- The VPS will boot into the Windows installation environment. Follow the on-screen instructions to install Windows.
- Choose your language, time format, keyboard input method, and click “Next.”
10. Product Key and Edition:
Enter your Windows product key if required. Choose the appropriate edition of Windows that matches your license.
11. Install Location and Partitioning:
Choose the installation location and partition where Windows will be installed. You might need to create or format partitions.
12. Follow Setup Steps:
Continue with the setup process, including selecting the partition for installation, formatting it, and copying files.
13. Create User Account:
Set up a user account and password for Windows.
14. Wait for Installation:
Windows will finalize the installation and might perform updates. This process can take some time.
15. First Login:
Once the installation is complete, you’ll be prompted to log in to your newly installed Windows system.
16. Install Drivers and Software:
- Depending on the VPS provider, you might need to install additional drivers to ensure optimal performance.
- Install any necessary software you need on your Windows VPS.
17. Configure Firewall and Security:
Set up Windows Firewall and any necessary security measures to protect your VPS.
18. Backup and Maintenance:
Regularly back up your VPS and keep your Windows system updated for security and performance reasons.
Remember to follow any specific instructions provided by HelloRDP during the installation process.


can i take two 5mg cialis at once
can i take two 5mg cialis at once